Dive into the world of cinematography script breakdown and discover how to craft stunning visuals from written words. Our comprehensive guide covers everything from shot design to lighting techniques, helping you bring your cinematic vision to life.

Welcome to the wild world of cinematography script breakdown, where we turn boring words into jaw-dropping visuals. It’s like alchemy, but instead of turning lead into gold, we’re transforming ink into light.
This guide is your backstage pass to the magic show of visual storytelling. We’ll dive into the nitty-gritty of how cinematographers dissect a script and emerge with a blueprint for cinematic brilliance.
Whether you’re a newbie with stars in your eyes or a grizzled veteran looking to sharpen your skills, buckle up. We’re about to embark on a journey through the art and science of cinematography script breakdown. It’s gonna be a wild ride, so hold onto your viewfinders!
Alright, fellow visual storytellers, let’s dive into the world of cinematography script breakdown. It’s like being a cinematic detective, but instead of solving crimes, you’re decoding words to create jaw-dropping visuals. No pressure, right?
At its core, cinematography script breakdown is the process of dissecting a screenplay to plan the visual elements of a film. It’s where we transform those boring black-and-white pages into a technicolor dreamscape. Without it, we’d be shooting blind – and trust me, that’s only fun if you’re making a found-footage horror flick.
As cinematographers, our job is to be the script whisperer. We need to read between the lines, sniff out the subtext, and visualize what’s not explicitly written. It’s like being a psychic, but instead of predicting the future, we’re creating it frame by frame.
Script breakdown is the bridge between words and visuals. It’s where we decide if a scene calls for a dramatic dolly zoom or if a simple static shot will do the trick. It’s our chance to add visual punctuation to the writer’s prose, turning periods into exclamation points and commas into lens flares (use sparingly, unless you’re J.J. Abrams).
Let’s cut the bull: some cinematographers claim they never visualize the screenplay on the first read. Nonsense. As visual storytellers, it’s impossible not to start painting mental pictures immediately. It’s like telling a chef not to think about flavors while reading a recipe – ain’t happening.
Here’s the deal: you’re going to visualize scenes as you read, and that’s okay. It’s part of what makes you a great cinematographer. The trick is staying flexible and not getting too attached to these initial ideas.
As you dive in, let your imagination run wild. See a sweeping crane shot? Jot it down. Moody, low-key lighting? Make a note. These early sparks can be gold later.
But remember, your main goal is still to absorb the story, identify themes, and get a feel for the overall mood. Is it a gritty noir or a whimsical rom-com? Let the genre and story guide your visual instincts.
Bottom line: don’t fight visualization, embrace it. Just keep those mental images in pencil, not permanent marker. You’re laying groundwork, not carving in stone. Stay open, stay flexible, and let the story lead the way.

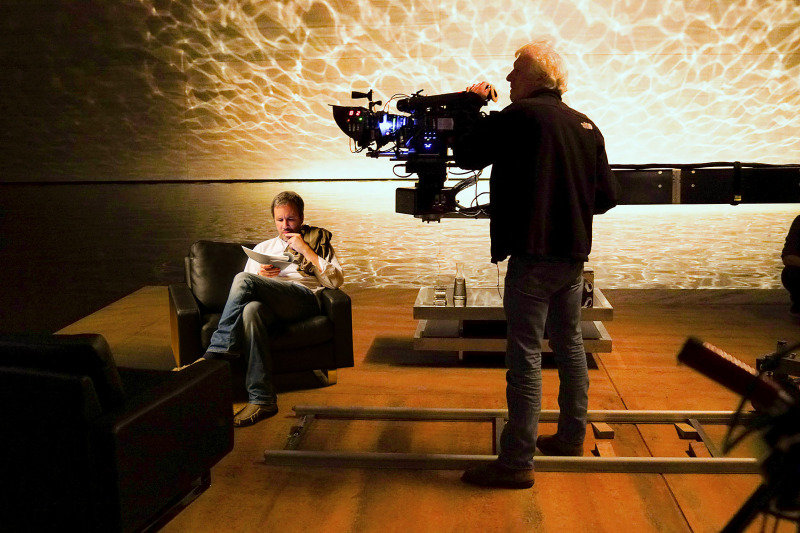
Time to tango with the big cheese – the director. But heads up: every director is a unique snowflake in the blizzard of filmmaking.
Some come at you with a script so meticulously shot-listed it makes your storyboards look like kindergarten drawings. Others might just shrug and say, “Make it look cool?” Most fall somewhere in between.
Your mission? Be a cinematic chameleon. Adapt faster than a grip can set up a C-stand. If they’re detail-oriented, bring specific ideas. If they’re abstract, whip out those mood boards.
This is where you’ll discover if you’re cinematic soulmates or starring in your own behind-the-scenes drama. Sometimes, your visions clash like a bad color grade. Other times? You might just find your director buddy for life.
Communication is key. Use visual references, sketches, or interpretive dance (results may vary). Be clear about your ideas, but stay open to theirs.
Remember, it’s a collaboration, not an ego battle. Compromise is part of the game. It’s a cinematic tango – you gotta move in harmony to create something beautiful.
Need more tips on director-wrangling? Check out our Pre-production Planning for Cinematographers guide. It’s your survival kit for these early stages.
Alright, camera cowboys and lighting ladies, it’s time to roll up our sleeves and get down to the nitty-gritty of script breakdown. This is where we transform that stack of paper into a visual roadmap. It’s like turning a pile of LEGO bricks into a masterpiece – except our masterpiece involves lights, camera, and hopefully no continuity errors.
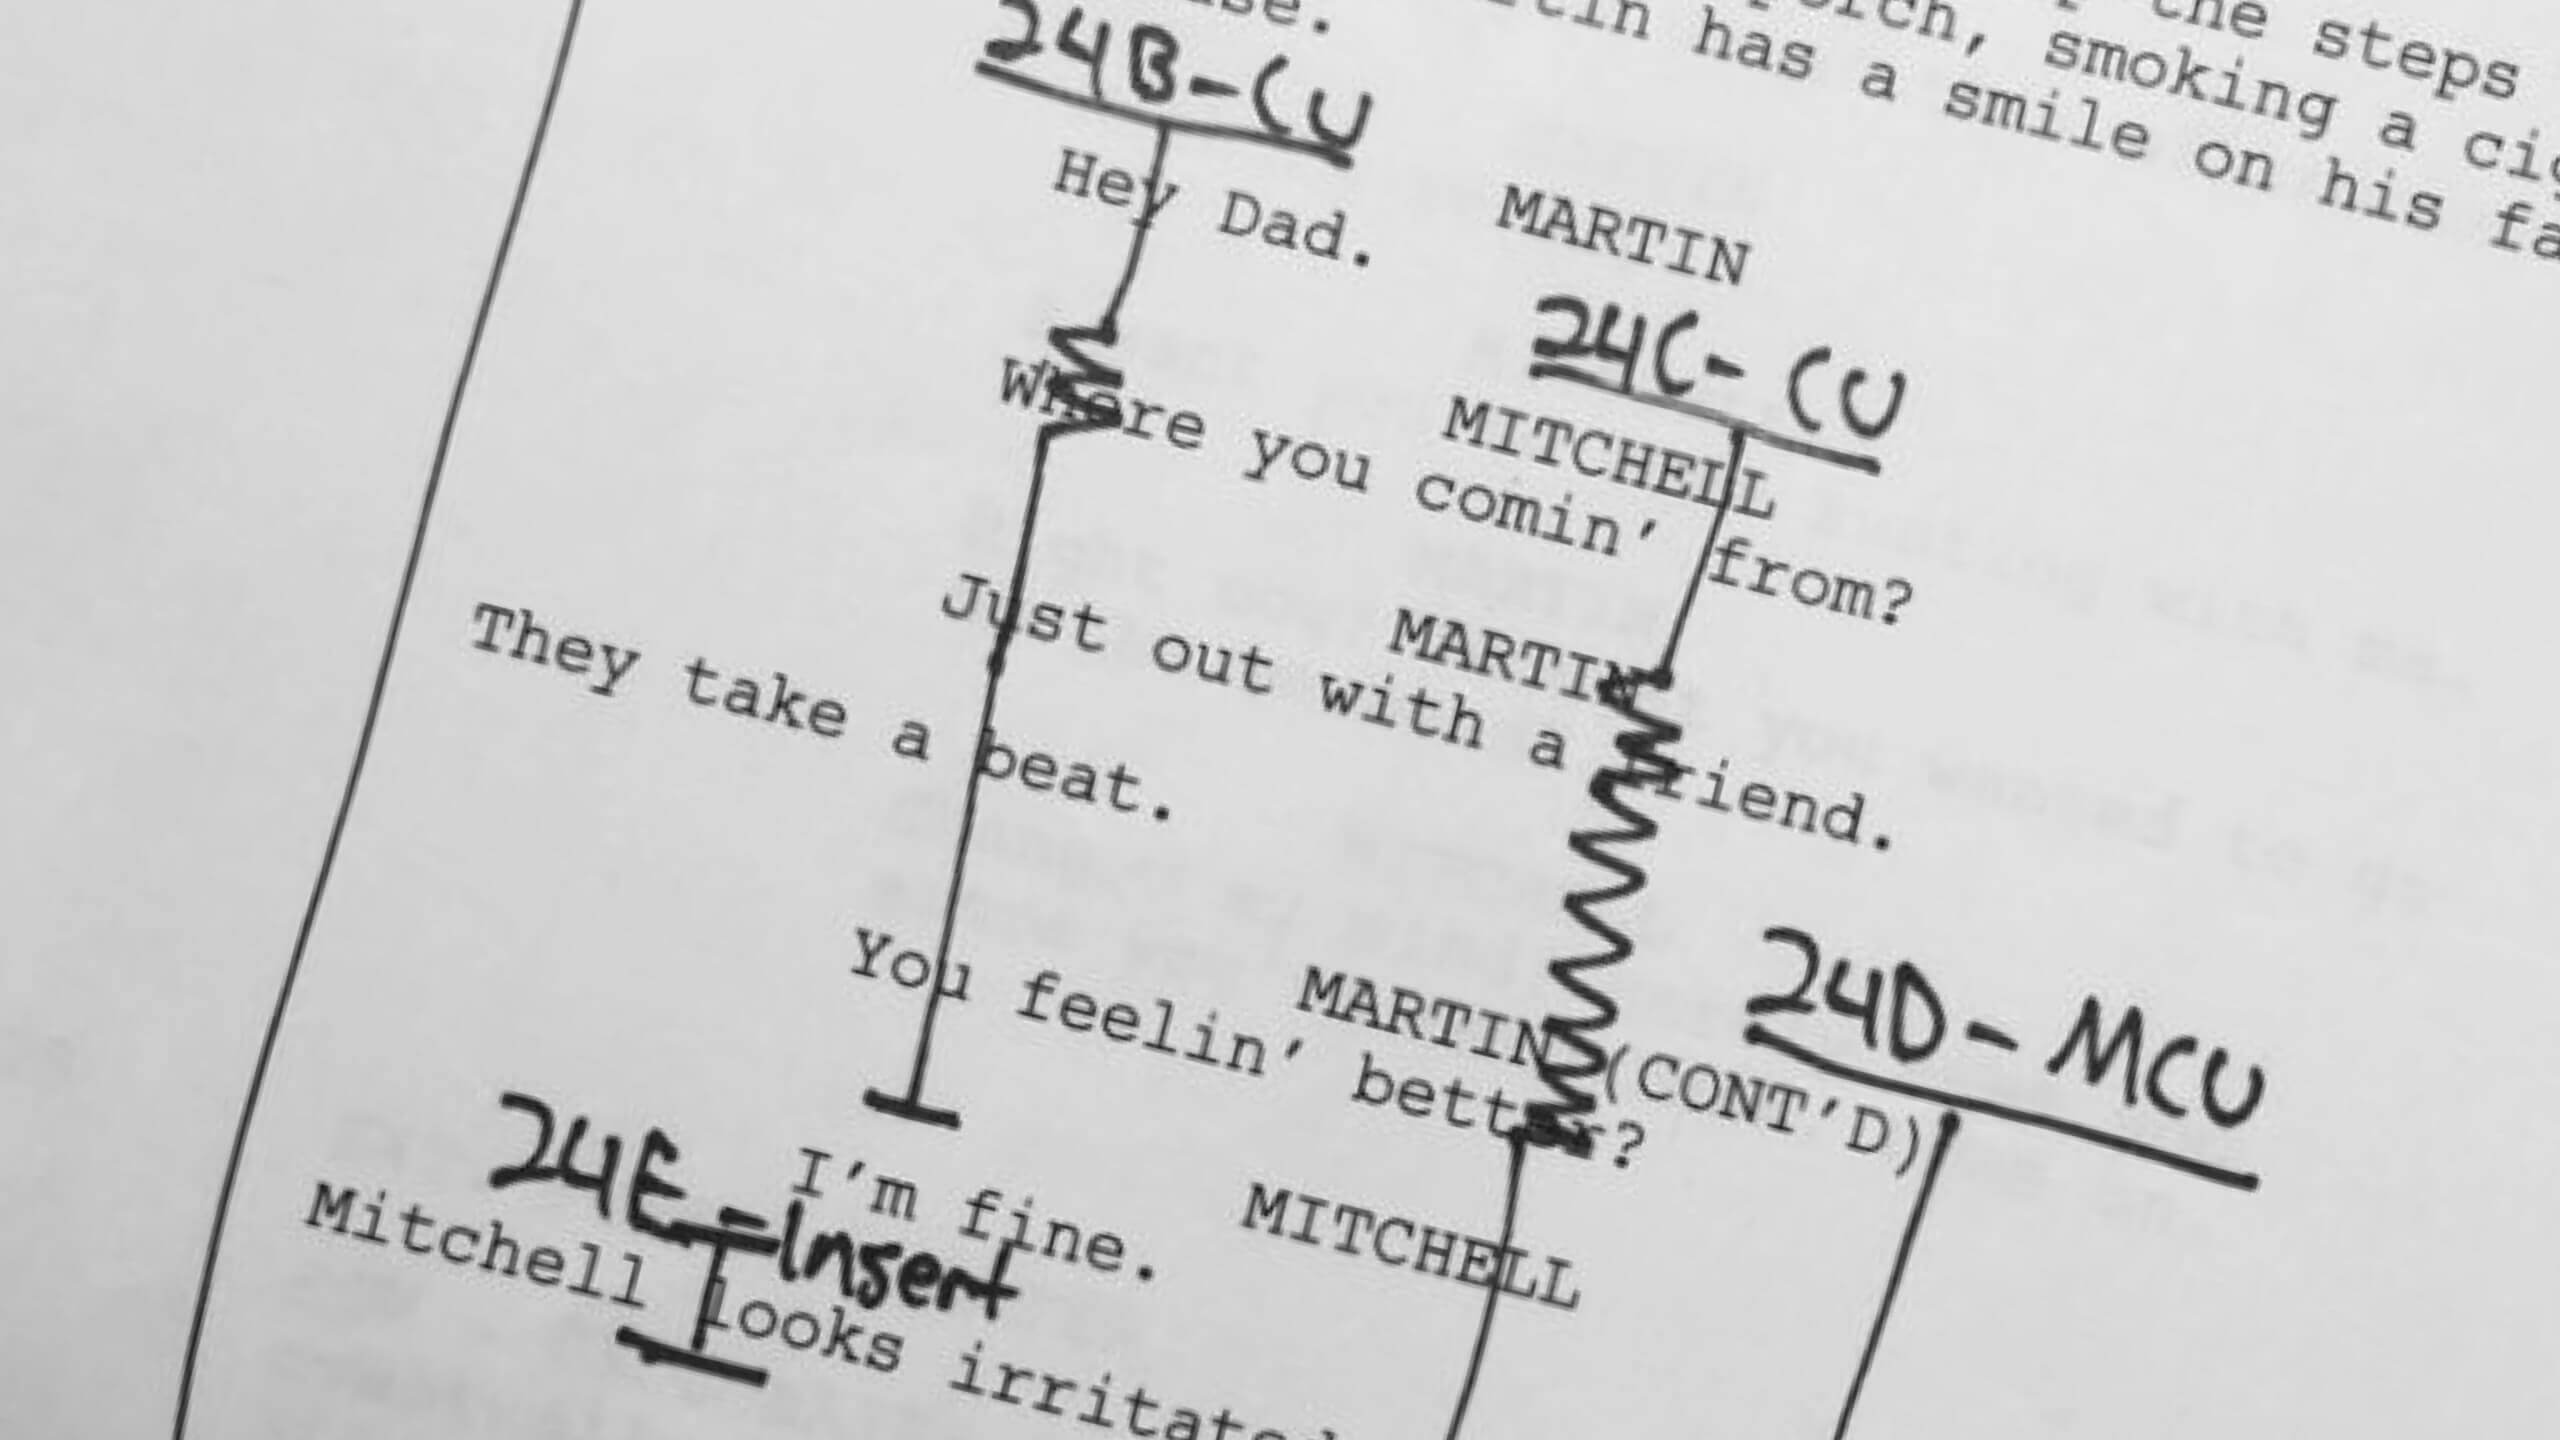
First things first, we’re going to dissect this script like it’s a frog in biology class – minus the formaldehyde smell. Take each scene and put it under your cinematic microscope.
Look for the beats and measures within each scene. What’s a beat, you ask? It’s a change in action or emotion – the building blocks of your visual narrative. Think of them as the morse code of filmmaking: short-short-long might translate to close-up, close-up, wide shot.
As you analyze, start thinking about the visual structure for the entire film. Are there recurring visual motifs? Does the protagonist’s world need to look different from the antagonist’s? Maybe the color palette shifts as the story progresses? This is your chance to plan the visual journey that’ll keep your audience glued to their seats (or at least awake).

Now comes the fun part – turning your analysis into actual shots. This is where you get to flex those creative muscles and plan out every frame like a chess grandmaster.
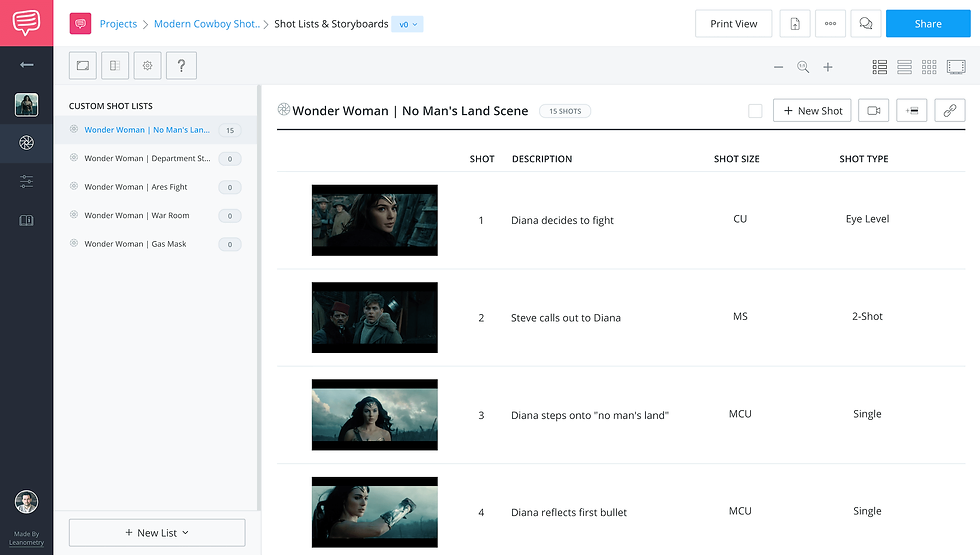
Start by translating your scene analysis into specific shots. Close-ups for emotional beats, wide shots for establishing location, tracking shots for dynamic action – each type of shot has its purpose in your storytelling arsenal.
Remember, though, we’re not just creating art here – we’re making a movie that needs to be, you know, actually filmed. So while you’re dreaming up that epic 360-degree rotating shot that transitions from day to night, also consider if it’s practical. Can it be done in the time and budget you have? Will the gaffer strangle you with a C-stand if you suggest it? Balance is key, folks.
For those of you who like to keep things organized (and who doesn’t in this chaos we call filmmaking?), check out some nifty tools to help with your breakdown and shot listing:
Remember, these tools are here to help, not replace your creative brain. Use them wisely!
Time to flex those artistic muscles! These visual tools are your secret weapons in the war against bland cinematography.
Think of a cinematography lookbook as your visual pitch deck – it’s where you showcase your brilliant (or questionable) ideas to the rest of the team.
Your lookbook should be a smorgasbord of visual delights: color palettes, lighting references, framing examples, and anything else that captures the essence of your vision. It’s like creating a mood board for your film’s therapy session.
Gathering references is the fun part. Raid art galleries (online, please – we don’t need any heist movies here), binge-watch films, or lose yourself in photography books. Just remember to come up for air occasionally.
For those who prefer a more streamlined approach, check out these fantastic reference libraries:
The real magic happens when you use this lookbook to communicate with your team. It’s your universal translator, turning your abstract ideas into concrete visuals that even the most imagination-challenged producer can understand.

Storyboards and overhead sketches are like the Batman and Robin of visual planning – different, but both fighting for the cause of great cinematography.
Storyboards are your shot-by-shot comic book of the film. They’re perfect for planning complex sequences or when you need to convey the emotional impact of a shot. Can’t draw? No worries – stick figures work too. It’s about the idea, not your fine art skills.
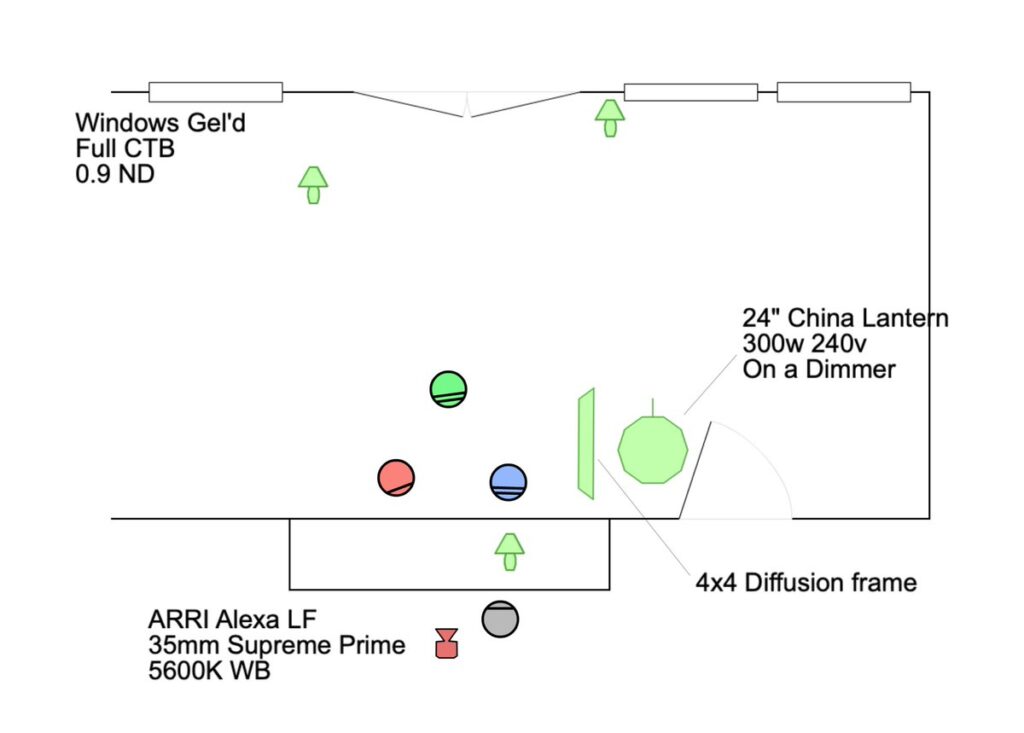
Overhead sketches, on the other hand, are your bird’s-eye view battle plans. They’re great for blocking scenes, planning camera movements, and making sure your gaffer doesn’t accidentally decapitate an actor with a boom pole.
When to use each? Storyboard when you need to sell the visual impact of a scene. Use overheads when you’re planning logistics and want to avoid on-set chaos.
For the digitally inclined (welcome to the 21st century, folks), check out these storyboarding tools:
Remember, these tools are here to make your life easier, not to replace your creative vision. Use them wisely, and may your storyboards be ever clear and your overheads ever accurate!
Alright, gear heads, it’s time to geek out over the technical stuff. This is where art meets science, and where your dreams of that perfect shot collide with the harsh reality of physics and budgets.
Picking your camera and lenses is like choosing a weapon for battle. Except in this battle, you’re fighting against bad visuals, and your enemy is a poorly lit, out-of-focus mess.
The script isn’t just a story – it’s a technical manual in disguise. A gritty street drama might call for handheld shots and wide lenses, while a period romance might beg for smooth movements and longer focal lengths. Pay attention to the locations, the pace of the scenes, and the emotional tone. They’re all dropping hints about your ideal setup.
But here’s the kicker – your artistic vision might want an IMAX camera and a set of vintage anamorphic lenses, but your budget might be screaming “smartphone and a magnifying glass.” It’s all about finding that sweet spot between what you want and what you can actually pull off without selling a kidney.
Remember, the best camera is the one that tells the story effectively. Sometimes that’s the latest 8K monster, and sometimes it’s the trusty DSLR that’s been through war with you.
Lighting isn’t just about making things visible – it’s about painting with photons, sculpting shadows, and making your actors look like gods (or monsters, depending on the role).
As you break down the script, look for lighting cues hiding in plain sight. Is it a sunny day or a stormy night? Is your character walking into a dimly lit bar or a bright, sterile hospital? These aren’t just setting details – they’re your lighting roadmap.
Start sketching out a preliminary lighting plan. Will you need a ton of diffusion for that soft, romantic glow? Or are we talking hard light and deep shadows for that film noir feel? Plan it out, but be ready to adapt on set when the actor decides their character would totally light a cigarette in that dark corner you carefully lit.
Remember, lighting isn’t just technical – it’s emotional. As the story evolves, your lighting should follow suit. Maybe start with bright, airy setups and gradually descend into darker, moodier lighting as things go south for your protagonist. It’s like a visual mood ring for your film.
Alright, visual virtuosos, let’s wrap this up! Remember, at the heart of every great cinematography script breakdown is one simple truth: character equals story. Your job isn’t just to make pretty pictures – it’s to serve the narrative and bring the director’s vision to life.
As you dive into your next script, keep this mantra in mind: story first, fancy shots second. Break it down, plan it out, but always be ready to throw your plans out the window if the story demands it.
Now go forth, armed with your newfound breakdown skills, and turn those words into cinematic gold. Just remember, if all else fails, lens flares can hide a multitude of sins. (Kidding! Or am I?)